
티스토리 뷰
이제 실제로 migration을 만들기 전에 Prisma에 대해 조금은 알아보고 시작해보자.
❓Prisma
- Node.js 기반의 ORM(Object-Relational-Mapping) 도구
- 데이터베스와 상호작용을 단순화 하고 개발 생산성을 높이는 도구
- SQL 쿼리를 직접 작성하지 않고 javaScript 코드로 쿼리를 작성할 수 있게 해주는 도구
- 타입 세이프한 쿼리 작성을 통해 런타임 에러를 방지
- 타 ORM과는 달리, 자체적인 스키마 문법을 제공해 직접 DB마이그레이션, 클라이언트 코드 생성 작업 가능
개념
` Prisma Client `
Node.js & TypeScript용 쿼리 작성 클라이언트
` Prisma Migrate `
마이그레이션 시스템
` Prisma Studio `
데이터베이스의 데이터를 보고 편집하는 GUI
Prisma로 데이터 모델 정의하기
model User {
  id                      String        @id @default(uuid())
  email                   String        @unique
  name                    String?
  image                   String?
  desc                    String?
  rooms                   Room[]
}

model Room {
  id                      Int           @id @default(autoincrement())
  title                   String
  images                  String[]
  hasWifi                 Boolean       @default(false)
  userId                  String
  user                    User          @relation(fields: [userId], references: [id], onDelete: Cascade)
@@index([userId])
}- 데이터모델을 정의해 데이터베이스 테이블과 관련된 개체를 생성(데이터 모델은 schema.prisma파일에 정의)
- ` model User` ` model Room ` : 데이터베이스의 테이블을 나타낸다.
- ` @id ` : 기본키
- ` @unique ` : 데이터 유일성을 나타냄
- ` @relation ` : 테이블간의 관계 정의
명령어
npx prisma migrate dev >> migration 생성
npx prisma studio >> supabase가 아닌 studio로 확인
DATABASE_URL="postgresql://postgres.qsuuxdhkwcdugxpispka:[YOUR-PASSWORD]@aws-0-ap-northeast-2.pooler.supabase.com:6543/postgres"데이터베이스에 추가할 내용을 작성 후
npx prisma migrate dev 명령어를 사용하면 내가 작성한 db의 내용이 폴더로 생성이 된다.
⚠️주의할 점
npx prisma migrate dev 명령어 제대로 작동하지 않는 경우
`directUrl = env("DIRECT_URL")` 추가하기
prisma/schema.prisma
// This is your Prisma schema file,
// learn more about it in the docs: https://pris.ly/d/prisma-schema

// Looking for ways to speed up your queries, or scale easily with your serverless or edge functions?
// Try Prisma Accelerate: https://pris.ly/cli/accelerate-init

generator client {
  provider = "prisma-client-js"
}

datasource db {
  provider    = "postgresql"
  url         = env("DATABASE_URL")
}
변경후 ⬇️⬇️
// This is your Prisma schema file,
// learn more about it in the docs: https://pris.ly/d/prisma-schema

// Looking for ways to speed up your queries, or scale easily with your serverless or edge functions?
// Try Prisma Accelerate: https://pris.ly/cli/accelerate-init

generator client {
  provider = "prisma-client-js"
}

datasource db {
  provider    = "postgresql"
  url         = env("DATABASE_URL")
  directUrl   = env("DIRECT_URL")
}
그리고 .env 파일에서 ` DIRECT_URL ` 을 생성해주어야 한다.
` DIRECT_URL ` 작성 방법
DATABASE_URL의 코드를 그대로 복사해 DIRECT_URL에 복사 후 6543 ➡️ 5432 로 변경
`DATABASE_URL` 수정 방법
` ?pgbouncer=true `쿼리스트링을 가장 뒤에 추가
DATABASE_URL="postgresql://postgres.qsuuxdhkwcdugxpispka:[YOUR-PASSWORD]@aws-0-ap-northeast-2.pooler.supabase.com:6543/postgres"
변경후 ⬇️⬇️
DATABASE_URL="postgresql://postgres.qsuuxdhkwcdugxpispka:[YOUR-PASSWORD]@aws-0-ap-northeast-2.pooler.supabase.com:6543/postgres?pgbouncer=true"
DIRECT_URL="postgresql://postgres.qsuuxdhkwcdugxpispka:[YOUR-PASSWORD]@aws-0-ap-northeast-2.pooler.supabase.com:6543/postgres""
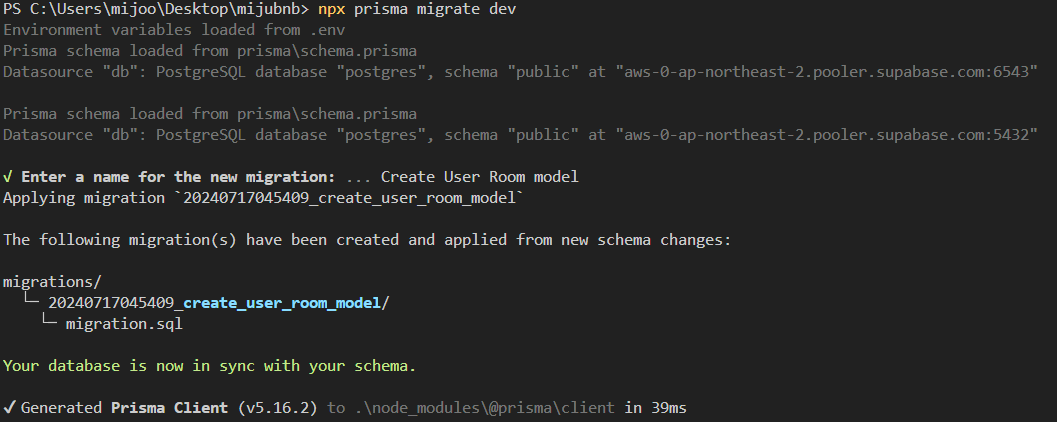
다시 npx prisma migrate dev 명령어를 작성하면
생성될 폴더의 이름을 작성하면 생성된 시간과 함께 내가 작성한 이름을 가진 폴더가 생성된 것을 볼 수 있다.
< npx prisma migrate dev 명령어 사용 및 폴더 이름 작성 >
< migrations 폴더 생성 >

*내용을 확인하면 SQL 문으로 생성되어 있다.
'TIL' 카테고리의 다른 글
| emotion css 사용해보기 (0) | 2024.08.14 |
|---|---|
| 대한민국 지도 레이어 모델링 파일 만들기 (0) | 2024.08.10 |
| Supabase와 Prisma 함께 사용하기 1.셋팅 (0) | 2024.07.16 |
| access, refresh token의 개념과 관리 방법 요약본 (1) | 2024.07.08 |
| axiosInstance 리펙토링하기 (0) | 2024.07.06 |
공지사항
최근에 올라온 글
최근에 달린 댓글
- Total
- Today
- Yesterday
링크
TAG
- styled component 설치방법
- Warning: validateDOMNesting(...): <li> cannot appear as a descendant of <li>
- styled component 조건부 사용방법
- git cache
- Warning: Each child in a list should have a unique "key" prop.
- readme 역할
- readme 작성해야 하는 이유
- nextjs 토큰 만료처리하기
- styled component 사용방법
- axiosinstance 사용 시 토큰 사용 법
- readme 이미지 추가 방법
- readme작성해보기
- 별점 색채우기
- 에러모음집
- styled component GlobalStyle 사용방법
- axios CRUD
- 유효성검사
- axios instance 작성하기
- Warning: A component is changing an uncontrolled input to be controlled.
- Fetch와 Axios 의 장단점
- axios 사용하기
- 유효성검사 css
- 영화 별점
- axios 설치하기
- 영화별점만들기
- 별점만들기
- simple Icon 사용방법
- readme 작성 방법
| 일 | 월 | 화 | 수 | 목 | 금 | 토 |
|---|---|---|---|---|---|---|
| 1 | 2 | 3 | ||||
| 4 | 5 | 6 | 7 | 8 | 9 | 10 |
| 11 | 12 | 13 | 14 | 15 | 16 | 17 |
| 18 | 19 | 20 | 21 | 22 | 23 | 24 |
| 25 | 26 | 27 | 28 | 29 | 30 | 31 |
글 보관함