
티스토리 뷰
드디어 길고 길었던 팀프로젝트 코드 분석을 오늘에서야 끝낼 수 있을 것 같다.
다른 부분은 쉬우니까 제하고 분석할 코드 하나 남았기 때문엥 ㅎ-ㅎ

< pushLocalStorage.js >
import updateReviewList from "./statelist.js";

const urlParams = new URLSearchParams(window.location.search);
const itemId = urlParams.get("id");

function getSelectedStars() {
  const checkedStar = document.querySelector(".getstar .star:checked");
  if (!checkedStar) {
    return "";
  }
  const score = parseInt(checkedStar.id.replace("star", ""), 10);
  let starImages = "";
  for (let i = 0; i < score / 2; i++) {
    starImages += '<img src="../assets/main/star-solid.svg" alt="star" />';
  }
  return starImages + ` ${score}점`;
}

function getSelectedAspects() {
  return Array.from(document.querySelectorAll(".aspects .aspect-item.active"))
    .map((el) => `#${el.textContent}`)
    .join(" ");
}

function getSelectedEmotions() {
  return Array.from(document.querySelectorAll(".emotions .emotion-item.active"))
    .map((el) => `#${el.textContent}`)
    .join(" ");
}

document.addEventListener("DOMContentLoaded", function () {
  const modalInstance = new Modal();
  const closeButton = new CloseButton(modalInstance);
  const personalInfo = new PersonalInfo();
  const submitButton = document.getElementById("submit");
  if (!submitButton) {
    console.error("Submit button not found");
    return;
  }
  submitButton.addEventListener("click", (event) => {
    event.preventDefault();
    if (personalInfo.validateName() && personalInfo.validatePassword()) {
      saveReview();
    } else {
      alert("입력한 정보를 다시 확인해주세요.");
    }
  });
  function saveReview() {
    const reviewData = {
      movie_id: itemId,
      name: document.getElementById("name").value,
      password: document.getElementById("password").value,
      impressions: document.getElementById("impressions").value,
      stars: getSelectedStars(),
      aspects: getSelectedAspects(),
      emotions: getSelectedEmotions(),
      date: new Date().toLocaleDateString("ko-KR")
    };
    let reviews = JSON.parse(localStorage.getItem("reviews")) || [];
    reviews.push(reviewData);
    localStorage.setItem("reviews", JSON.stringify(reviews));
    updateReviewList(itemId);
    closeButton.closeModal();
  }
});

//HTML
 <script type="module" src="../src/review/pushLocalstorage.js"></script>

   <div class="getstar" id="getstar">
    <label class="starlabel">
      <input class="star" id="star2" type="radio" name="star" value="" />
      <span class="staricon"><i class="fa-solid fa-star"></i></span>
    </label>
    <label class="starlabel">
      <input class="star" id="star4" type="radio" name="star" value="" />
      <span class="staricon"><i class="fa-solid fa-star"></i></span>
    </label>
    <label class="starlabel">
      <input class="star" id="star6" type="radio" name="star" value="" />
      <span class="staricon"><i class="fa-solid fa-star"></i></span>
    </label>
    <label class="starlabel">
      <input class="star" id="star8" type="radio" name="star" value="" />
      <span class="staricon"><i class="fa-solid fa-star"></i></span>
    </label>
    <label class="starlabel">
      <input class="star" id="star10" type="radio" name="star" value="" />
      <span class="staricon"><i class="fa-solid fa-star"></i></span>
    </label>
  </div>
-- import --
import updateReviewList from "./statelist.js";
statelist.js 는 리뷰 목록을 띄워주고 movie의 id 값을 받아
클릭된 영화에 해당되는 리뷰만 보여줄 수 있는 역할을 하는 함수이다.
아래 주소에 statelist.js 함수 있으니 참고!
https://anywhereim.tistory.com/13
-- movie id 받아오기 --
const urlParams = new URLSearchParams(window.location.search);
const itemId = urlParams.get("id");
urlParams.get 을 이용해 id 값 get!!
-- function getSelectedStars --
function getSelectedStars() {
  const checkedStar = document.querySelector(".getstar .star:checked");
  if (!checkedStar) {
    return "";
  }
  const score = parseInt(checkedStar.id.replace("star", ""), 10);
  let starImages = "";
  for (let i = 0; i < score / 2; i++) {
    starImages += '<img src="../assets/main/star-solid.svg" alt="star" />';
  }
  return starImages + ` ${score}점`;
}
getstar에서 체크된 star를 찾아 return 해주고,
score는 parseInt함수로 첫번째 인자는 변환할 문자열로 checked.id.replace("star", " ") 에서 star를 제외한 숫자.
두번째 인자는 변환할때 사용할 진수로 넣어준다.
즉, 5번째 별을 클릭하면 star10 에서 star를 제외한 10라는 문자열을 숫자 10으로 변환해 준다.
그리고 for 문으로 i = 0 일때 i < score / 2 ; 일때까지 i++를 하게 된다
**id = star2, star4, star6, star8, star10
별 1개당 2점으로 계산 할 수있도록 id 값을 지정해두었음
때문에 /2를 해주어야 선택된 별의 갯수를 알 수 있음.
계산된 값만큼 <img src="../assets/main/star-solid.svg" alt="star" /> 이미지가 나오고 ${score} 점은 숫자로 변환된 값을 받게된다.
**<img src="../assets/main/star-solid.svg" alt="star" /> 는 아래 별모

그럼 10/2 = 5 , scpre는 10 점으로 계산되어 아래처럼 나오게 된다.

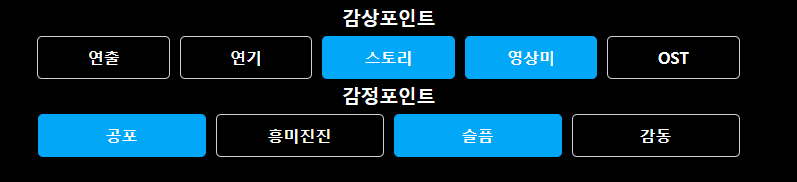
< function getSelectedAspects >
function getSelectedAspects() {
  return Array.from(document.querySelectorAll(".aspects .aspect-item.active"))
    .map((el) => `#${el.textContent}`)
    .join(" ");
}
aspect 에서 선택된 값을 가져와 map.(선택된 값을 전달) 으로 새로운 배열을 만들고
백틱. 즉 템플릿 리터럴을 이용해 #을 붙인 문자열로 반환
그리고 선택된 값들을 join 함수를 이용해 선택된 값들을 모두 합쳐서 반환
ex) #연출 #OST
< function getSelectedEmotions >
function getSelectedEmotions() {
  return Array.from(document.querySelectorAll(".emotions .emotion-item.active"))
    .map((el) => `#${el.textContent}`)
    .join(" ");
}
function getSelectedAspects 와 동일함으로 설명은 생략.
아래 이미지처럼 나오게 된다.
⬇️

< submitButton 실행 검사? >
document.addEventListener("DOMContentLoaded", function () {
  const modalInstance = new Modal();
  const closeButton = new CloseButton(modalInstance);
  const personalInfo = new PersonalInfo();
  const submitButton = document.getElementById("submit");

  submitButton.addEventListener("click", (event) => {
    event.preventDefault();
    if (personalInfo.validateName() && personalInfo.validatePassword()) {
      saveReview();
    } else {
      alert("입력한 정보를 다시 확인해주세요.");
    }
  });
새로 만든 인스턴스들을 불러오고,
submitButton에 addEventListener 이벤트를 이용해 click 되면 이벤트를 발생시킨다.
만약 personInfo 부분에 이름 유효성 검사 값 && personinfo. 비밀번호 유효성 검사 값이 true일때만
saveReview 호출
**true일때만 호출이 되는 이유는 둘다 false일 수 없다.
이유는 validatePassword 부분을 숫자로 정해진 글자 만큼만 작성 할수 있도록 해 두었기 때문에 틀린 값을 입력 할 수 없음
검사 값이 다른 경우에는 alert로 "입력한 정보를 다시 확인해주세요" 띄우기
< function saveReview >
  function saveReview() {
    const reviewData = {
      movie_id: itemId,
      name: document.getElementById("name").value,
      password: document.getElementById("password").value,
      impressions: document.getElementById("impressions").value,
      stars: getSelectedStars(),
      aspects: getSelectedAspects(),
      emotions: getSelectedEmotions(),
      date: new Date().toLocaleDateString("ko-KR")
    };
    let reviews = JSON.parse(localStorage.getItem("reviews")) || [];
    reviews.push(reviewData);
    localStorage.setItem("reviews", JSON.stringify(reviews));
    updateReviewList(itemId);
    closeButton.closeModal();
  }
reviewData에 객체에 기재된 순서로 값을 담을 수 있는 그릇을 만들어 두고
JSON 형태로 로컬스토리지에 getItem을 이용해 reviews를 가져오고 배열로 저장! 만약 없다면 빈배열
reviews에 저장된 값을 reviewData에 밀어 넣고
localstorage.setItem 을 이용해 reviews를 JSON. 문자형태로( ) 변환해서 localstorage에 저장
import로 받아온 updageReviewList에 (itemId)를 인자로 사용하고
closeButton.closeModal(호출)
이렇게 어려웠던 코드 부분들을 전부다 해석했다.
진짜 어휴 필요없는 함수들도 너무 많고 디버깅도 너무 힘들었지만
코드들을 다시 한번 살펴 보면서 이해하지 못했던 부분도 이해하고 넘어갈 수 있었고
사용되지 않는 코드들이나 미처 지우지 못했던 console.log 부분들도 정리 할 수 있었다.
이제 React를 시작해 보자 ㅎㅎㅎㅎㅎㅎㅎㅎㅎ
'TIL' 카테고리의 다른 글
| 2024. 01 .21 css 스크롤 & git cache & README 작성해보기 (0) | 2024.01.21 |
|---|---|
| 2024. 01 .18 React 간단하게 알아보기 (0) | 2024.01.19 |
| 2024. 01 .16 TMDB 영화 리뷰 기능 구현 코드 뜯어보기_2 (팀프로젝트) (0) | 2024.01.16 |
| 2024. 01 .15 TMDB 영화 리뷰 기능 구현 코드 뜯어보기 1 (팀프로젝트) (0) | 2024.01.15 |
| 2024. 01. 14 팀 프로젝트 완료 & Git push (0) | 2024.01.14 |
- Total
- Today
- Yesterday
- 별점 색채우기
- 유효성검사 css
- simple Icon 사용방법
- git cache
- styled component GlobalStyle 사용방법
- readme 작성 방법
- 영화별점만들기
- Warning: A component is changing an uncontrolled input to be controlled.
- readme작성해보기
- readme 작성해야 하는 이유
- 유효성검사
- readme 역할
- nextjs 토큰 만료처리하기
- axios CRUD
- styled component 조건부 사용방법
- styled component 사용방법
- 에러모음집
- axios instance 작성하기
- readme 이미지 추가 방법
- 별점만들기
- styled component 설치방법
- axios 사용하기
- Warning: validateDOMNesting(...): <li> cannot appear as a descendant of <li>
- axiosinstance 사용 시 토큰 사용 법
- 영화 별점
- axios 설치하기
- Fetch와 Axios 의 장단점
- Warning: Each child in a list should have a unique "key" prop.
| 일 | 월 | 화 | 수 | 목 | 금 | 토 |
|---|---|---|---|---|---|---|
| 1 | 2 | 3 | 4 | 5 | 6 | 7 |
| 8 | 9 | 10 | 11 | 12 | 13 | 14 |
| 15 | 16 | 17 | 18 | 19 | 20 | 21 |
| 22 | 23 | 24 | 25 | 26 | 27 | 28 |